CITIZEN – introduction

For the past 7 months I had been working on prototype of an isometric ARPG video game. It’s called CITIZEN, which used to be referred to as 3400AD in this blog. Of course, the game’s concept has evolved drastically since then.

I had completed the prototype about 3 weeks ago, and released an early video sampler of some of the gameplay. I feel that it’s yet to evolve further still, in style and in the narrative.

The prototype was completed in Construct 2, an HTML5 framework. I had originally intended to complete the game in Construct, but for many reasons, I decided to use Unity instead. After all my experimentation, I might as well take advantage of my acquaintance with it.

I had thought of writing my development notes on this blog, but I figured it would be hard to re-factor it for purposes of technical history and documentation, which is the primary role of my development notes. So I created a new Unity-specific development blog specifically for this project.

Unity: Waypoint Scanning

waypoint_scanning

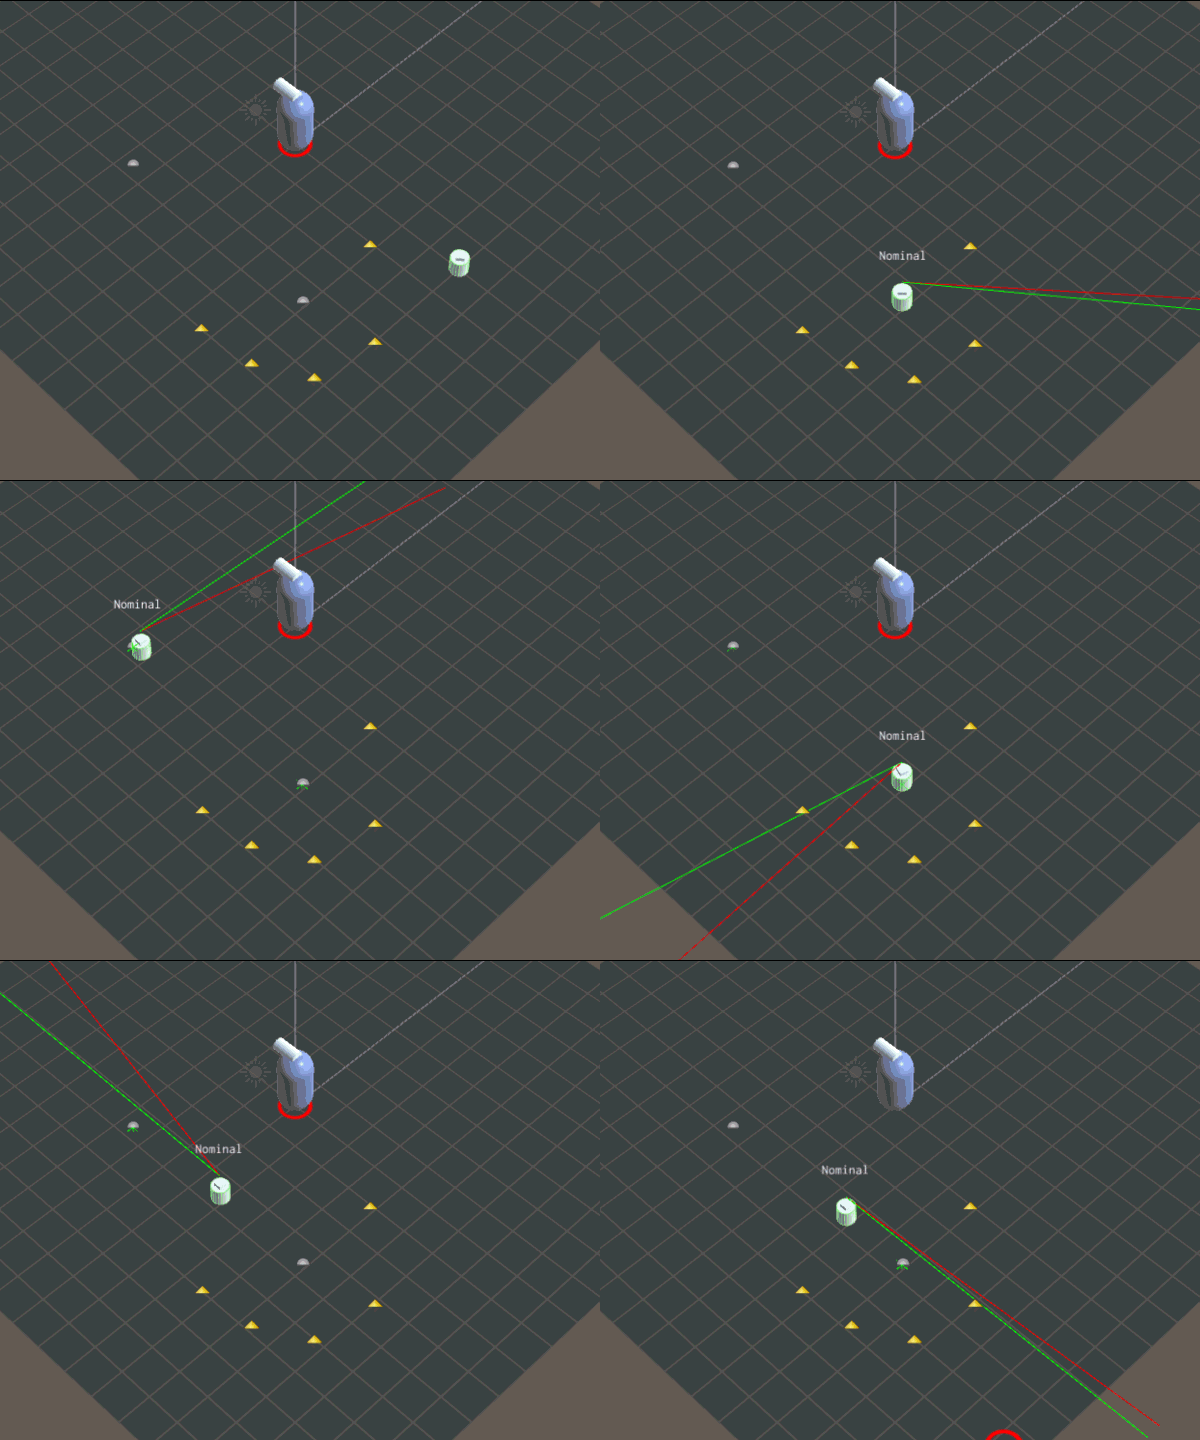
First stages in implementing the waypoint scanning behaviour in waypoints. The idea is when a waypoint is reached, and this waypoint instructs the robot to scan, the robot picks up the waypoint’s scan points. Any number of ‘scan points’ can be specified by parenting transforms under the main scan point object of that waypoint.

The scanning movement is handled by the RobotMovementClass, not the RobotGameClass, though I’m still feeling it out whether that’s the best solution.

On another note, I’ve modified the Game Pause/Unpause behaviour by using SendMessage to NavMeshAgents instead of using if() conditions on their Update() callback; this is mainly because NavMeshAgent functions like Resume() are unintentionally getting called when they’re supposed to sit still!

Unity: ScannerClass

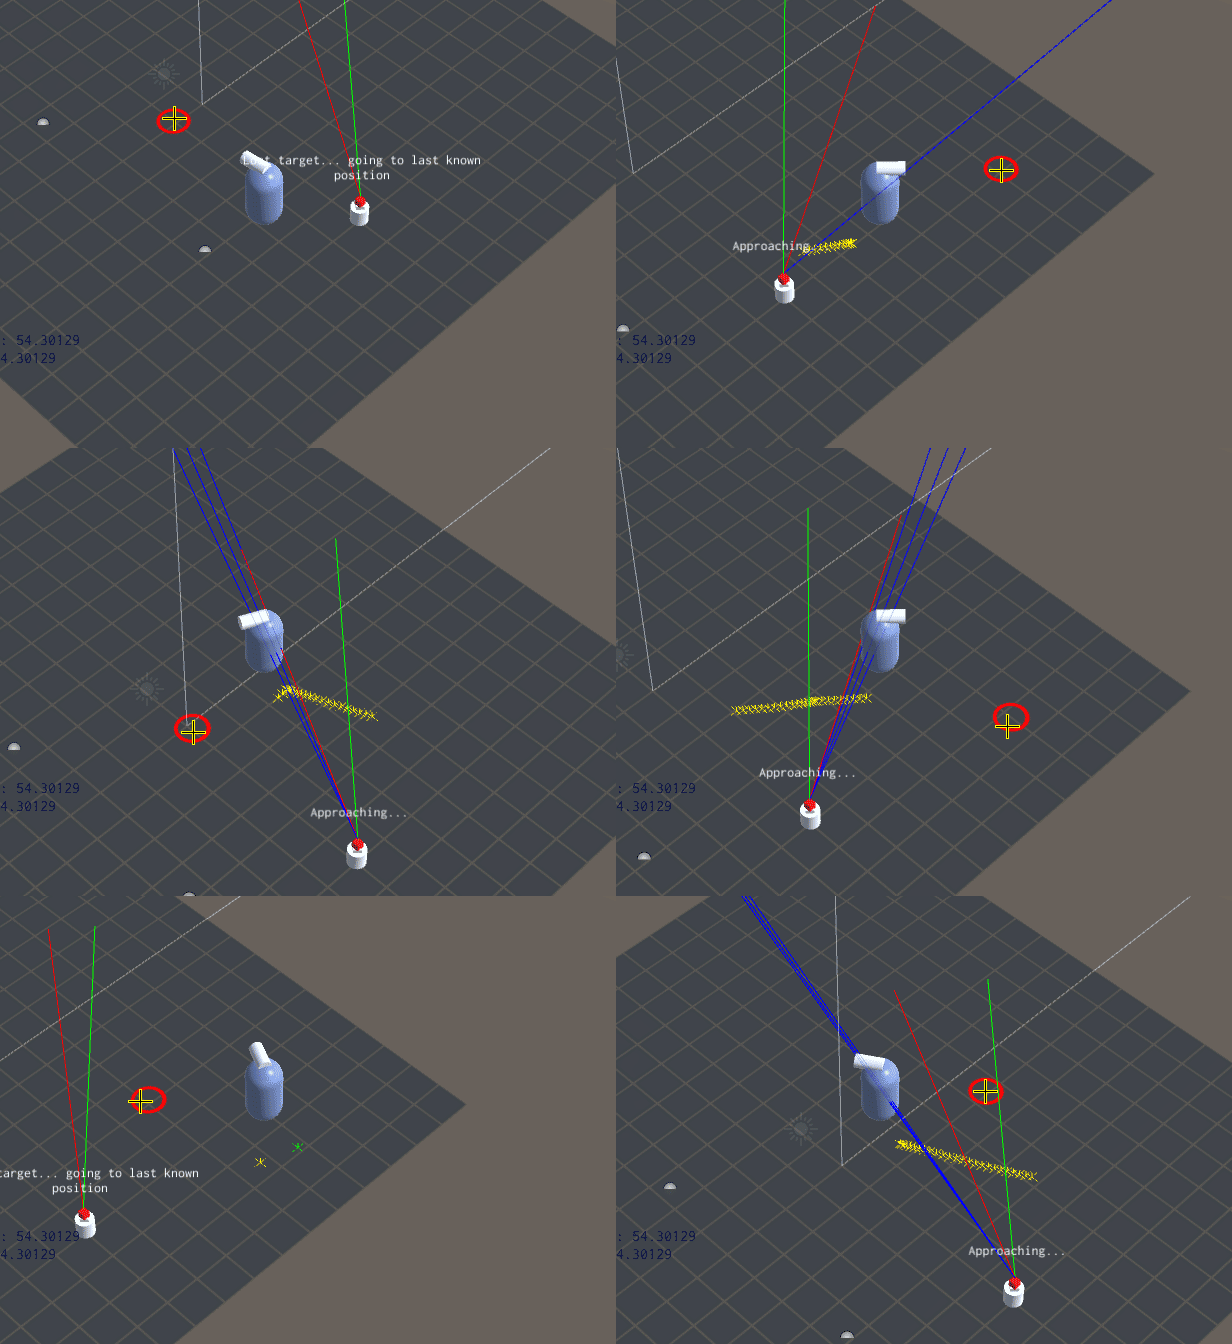
ScannerClass in action. Robot is targeting the player; green line is where the robot is facing; the red line is the centre of the scan direction, and the blue line is an indicator that robot has a positive LOS on its target. Note that when player beyond maximum scan angle (ie red line is limited to a certain angle), LOS is still positive until it goes beyond the field-of-view of the scan direction.

This class was a functionality that I deferred when I was creating the robot’s ‘game’ class. Originally, I had simply used a Raycast to determine LOS; I knew a scanning behaviour was needed, so I coded the robot generically in that respect.

The ScannerClass is attached to a scanning object that is parented under the the robot’s root transform. The behaviour is that it scans around (oscillating pattern or full revolution) using the parent transform as its base direction. The class itself rotates the scanner game object for (my) convenience.

When the RobotGameClass asks ScannerClass for LOS to a specified target (usually the target that attacked it), the scanner will determine at that time if the target had been found; if so, it locks on to it. The RobotGameClass, meanwhile, instructs the RobotMovementClass to face and move towards target, making the the scanner face the target naturally. If the target gets lost out of sight, the lock is broken by the ScannerClass itself and it goes back to scanning, and based on the RobotGameClass AI, it will either reacquire or not.

What I learned from the coding the ScannerClass was more awareness of how rotations — expressed in Quaternions — and vectors are translated to and from each other. Because the scanner is controlled by a ‘scan angle’, which is a float, I needed to make a procedure to translate target vectors to Quaternion rotations to get to the Euler angles. It sounds a bit convoluted, but I think to keep the simplicity of the driving values, which is where the source of the confusion often is, the messy bit had be sorted out that way.

Unity: Waypoint with ‘wait’ behaviour

waypoints_with_wait_behaviour

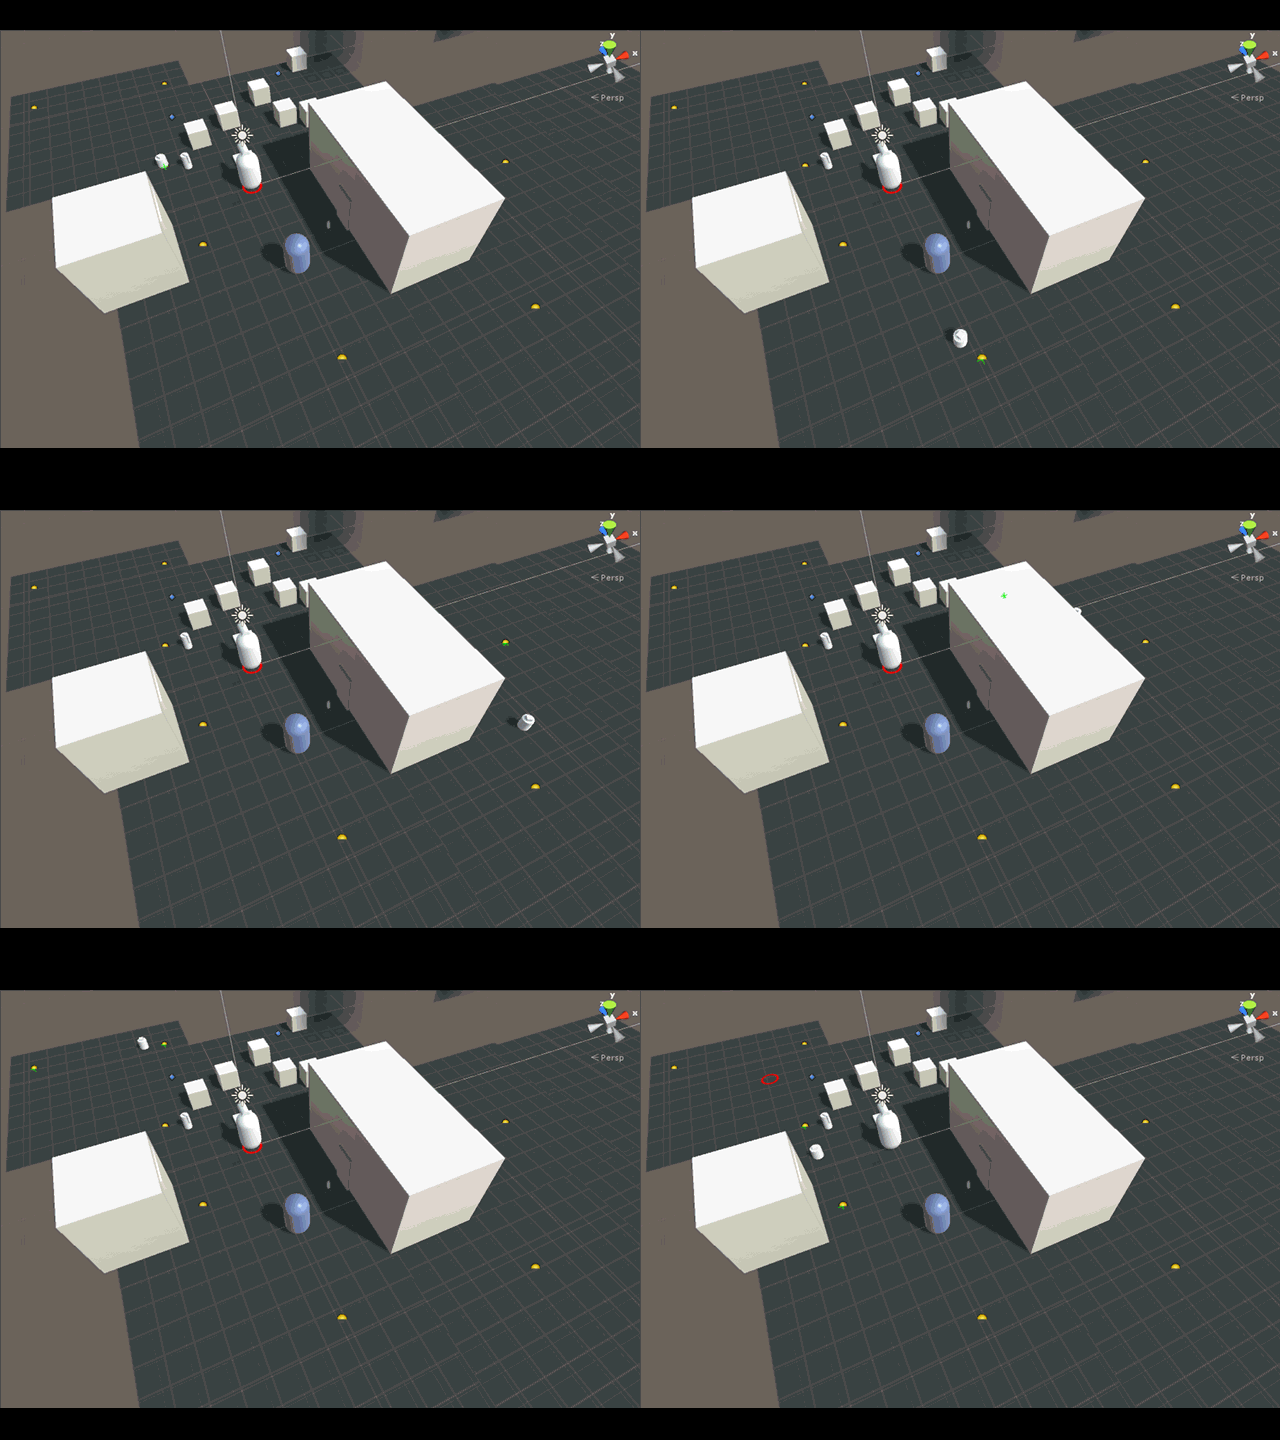
So here’s some visual aids!

The GIF above shows a simple waypoint system with an implicit behaviour system on the NavAgent game object. Currently, there’s only a ‘wait’ behaviour. The waypoints themselves have a WaypointClass which are driving the values in the NavAgent object. The trickiest bit, as usual, was the timing of TimerClass objects, and the proper way of stopping a NavMesh smoothly.

Unity: TimerClass

Ok, for seasoned (or maybe even not-so-seasoned) Unity developers, this is probably nothing. But I have been childishly happy about this TimerClass I’m trying to implement. It’s simplicity is what makes it exciting.

The TimerClass that I’m coding is a self-contained timer whose only requirement is that it is updated per Time.deltaTime; thus it needs to be called at the top of every Update(). This works for me because it’s neat to see all the timers up in one area instead of spread out through the code.

Before I get into the specific things that I like, this is how  the code looks like (written in Unityscript/Javascript):

#pragma strict

// This TimerClass keeps track of a timer
class TimerClass
{
	var timer_name:String;
	var end_time:float = 0; // the end time before the timer sends a signal to say time is up
	var counter: float = 0; // the counter for time
	var switchname:String; // whether the timer should keep on adding delta time or not
	var component:Component;
	var expired:boolean = false; // this notes whether the Timer had been previously started and now has expired; needs StartTimer do make a clean start
	// this.GetType().GetField(attrname).SetValue(this,parseInt(str));
	function TimerClass()
	{
		
	}
	function TimerClass(tn:String, sn:String, et:float, c:Component)
	{
		timer_name = tn;
		switchname = sn;
		end_time = et;
		component = c;
	}
	function UpdateTime(val:float)
	{
		var timerswitch = component.GetType().GetField(switchname).GetValue(component);
		if(timerswitch == true) // if the switch is TRUE
		{
			if(TimeUp() == false) // if the time is not up, then keep on adding time to the counter
				counter += val;
			else
			{
				component.SendMessage(timer_name+"_TimeUp",SendMessageOptions.DontRequireReceiver);
				EndTimer(); // end timer itself
			}
			
		}
	}
	function IsRunning()
	{
		var timerswitch = component.GetType().GetField(switchname).GetValue(component);
		return(timerswitch); // if the swtich is on, this means the timer is running
	}
	function StartTimer()
	{
		// this makes the switchname turn on
		component.GetType().GetField(switchname).SetValue(component,true);
		ResetTimer();
	}
	function StopTimer()
	{
		component.GetType().GetField(switchname).SetValue(component,false);
	}
	function EndTimer()
	{
		component.GetType().GetField(switchname).SetValue(component,false);
		expired = true;
	}
	function ResetTimer() // returns true if time is up
	{
		counter = 0;
		expired = false;
	}
	function TimeUp() // returns true if time is up
	{
		return(counter >= end_time);
	}

}

The two things that I like about this TimerClass is its feature to query a conditional boolean variable directly from the source Component that instantiated it, and the SendMessage mechanism based on the timer’s name, which is mandatory.

The class is instantiated in this way:

Timer = TimerClass("WaitTimer","is_waiting",5,this);

The first argument is the name of the timer, and this is concatenated with “_TimeUp” in order to form the SendMessage function. In the same script, a function is thus defined:


function WaitTimer_TimeUp()
{
...
}

The second argument is the ‘switch’ variable, which is a variable that is local to script. Note that it’s a String, not a variable reference; that’s because it’s not possible (for me) in Unityscript/Javascript to pass variables by reference. However, using Net Reflection techniques you can retrieve a ‘field’ from another Component using literal string.

The third argument is the number of seconds it takes for the timer to end or expire.

The fourth argument is ‘this’, which is the reference to the Component that has instantiated the TimerClass. This Component reference is used to retrieve the field specified in the second argument.

Reflection and SendMessage in action in the UpdateTime() function:

	function UpdateTime(val:float)
	{
		var timerswitch = component.GetType().GetField(switchname).GetValue(component);
		if(timerswitch == true) // if the switch is TRUE
		{
			if(TimeUp() == false) // if the time is not up, then keep on adding time to the counter
				counter += val;
			else
			{
				component.SendMessage(timer_name+"_TimeUp",SendMessageOptions.DontRequireReceiver);
				EndTimer(); // end timer itself
			}
			
		}
	}

This TimerClass has simplified enormously the tracking of timers across the game; I’m glad that I’ve actually started addressing this issue early on, as I know that would just get worse down the line if I didn’t have an elegant solution for it. I’m sure there’s still a lot I could improve, but I feel happy to have made a start.