CITIZEN – introduction

For the past 7 months I had been working on prototype of an isometric ARPG video game. It’s called CITIZEN, which used to be referred to as 3400AD in this blog. Of course, the game’s concept has evolved drastically since then.

I had completed the prototype about 3 weeks ago, and released an early video sampler of some of the gameplay. I feel that it’s yet to evolve further still, in style and in the narrative.

The prototype was completed in Construct 2, an HTML5 framework. I had originally intended to complete the game in Construct, but for many reasons, I decided to use Unity instead. After all my experimentation, I might as well take advantage of my acquaintance with it.

I had thought of writing my development notes on this blog, but I figured it would be hard to re-factor it for purposes of technical history and documentation, which is the primary role of my development notes. So I created a new Unity-specific development blog specifically for this project.

Unity: Waypoint Scanning

waypoint_scanning

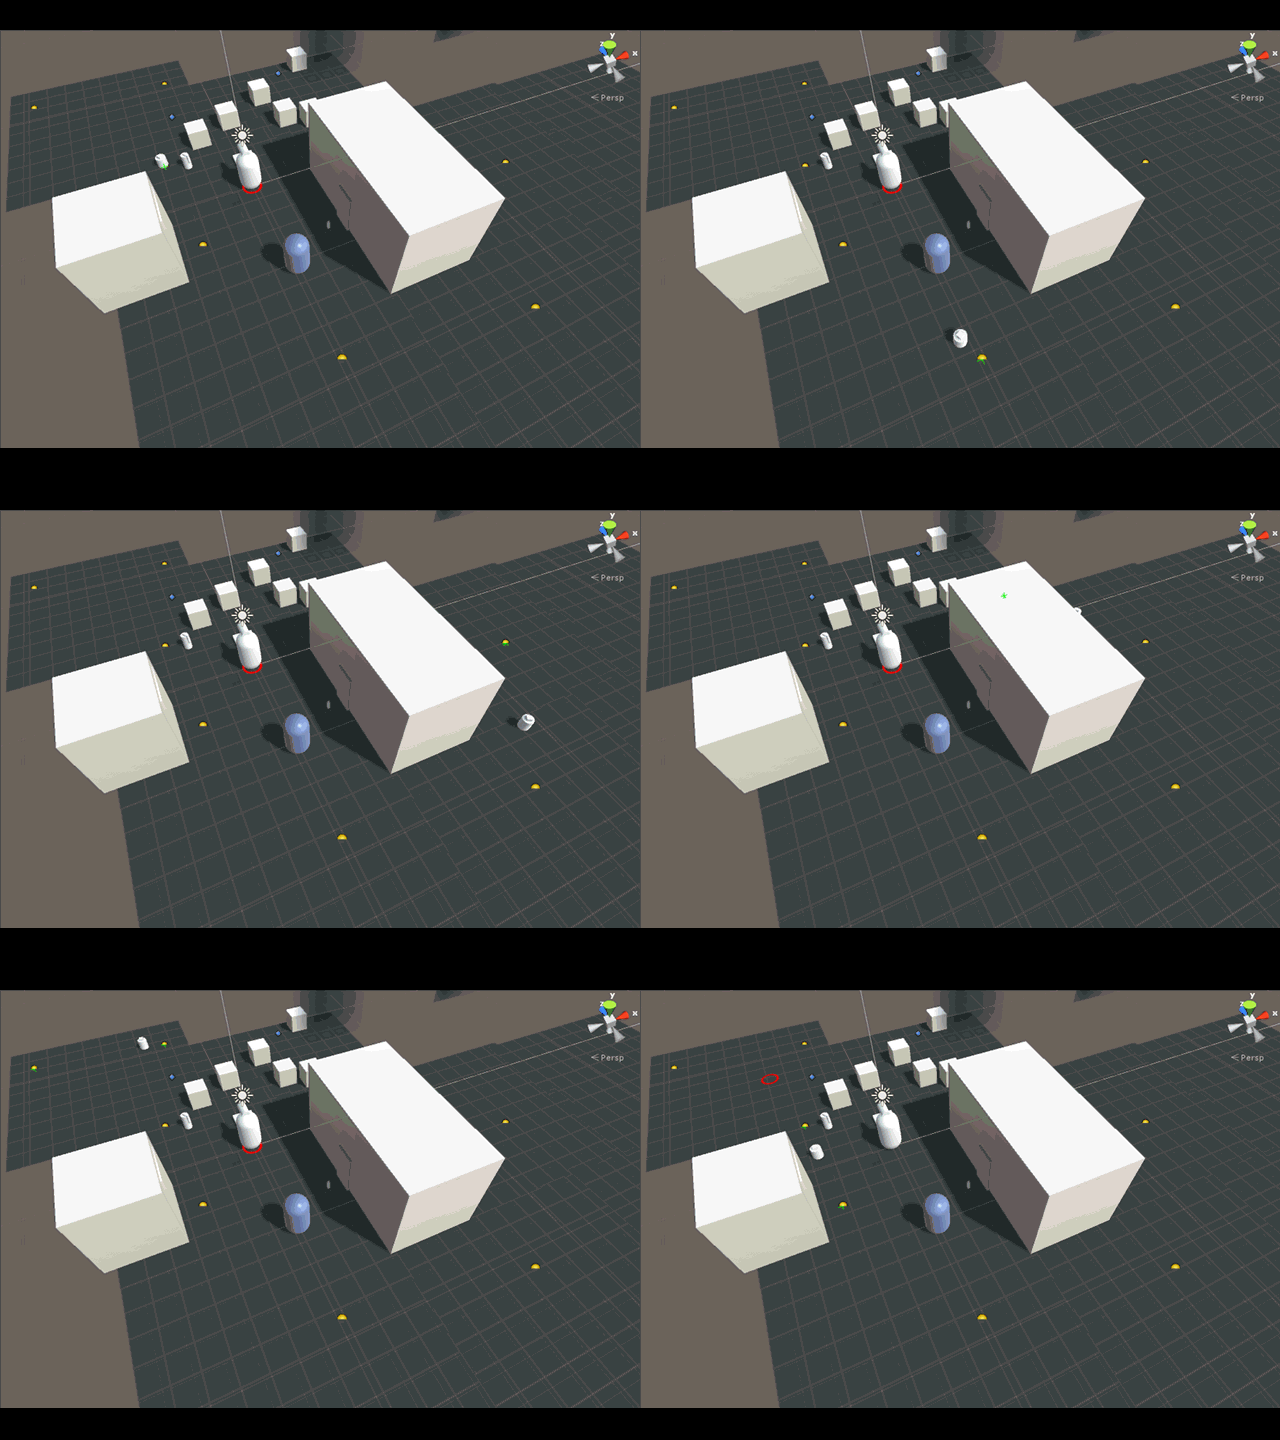
First stages in implementing the waypoint scanning behaviour in waypoints. The idea is when a waypoint is reached, and this waypoint instructs the robot to scan, the robot picks up the waypoint’s scan points. Any number of ‘scan points’ can be specified by parenting transforms under the main scan point object of that waypoint.

The scanning movement is handled by the RobotMovementClass, not the RobotGameClass, though I’m still feeling it out whether that’s the best solution.

On another note, I’ve modified the Game Pause/Unpause behaviour by using SendMessage to NavMeshAgents instead of using if() conditions on their Update() callback; this is mainly because NavMeshAgent functions like Resume() are unintentionally getting called when they’re supposed to sit still!

3400AD: Lookups

So I had been working in Open Office Calc recently, something I didn’t expect to do more than just table up some values and do simple additions. In fact, I got a little deeper than I thought I would.

Normally, I would weigh up the worth of learning something new with the practicality of getting stuff done. Furthermore, ‘getting stuff done’ is about keeping the flow of the work going so that I don’t get stuck, don’t procrastinate, don’t lose my train of thought. So it’s more than just producing new code, or new assets; it’s about striking when and where the iron is hot.

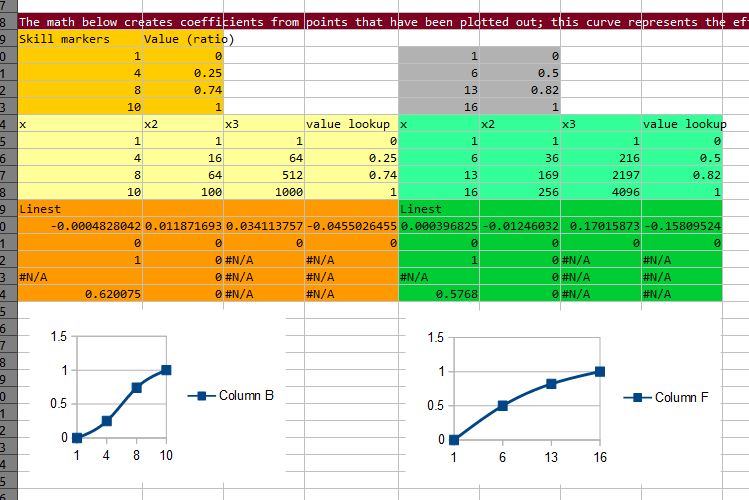
I had been working on tables in Calc because I use lookups for system rolls such as chance-to-hit and defence. Up to this point I had been simply inputting the values by hand (temporarily hard-coding it in Unity). But I realised that I wanted a way to visualise skill improvements as the player levelled up and apply this visualisation to the actual values. This visualisation was simply being able to draw a curve that represents increase of values over another value (eg skills).

2015-12-03 23_52_32-DisguiseStealth.ods - OpenOffice Calc

The basic premise is that I define a curve, whose Y value is from 0-1, and whose X value represents a real number, which, in the case I had been working on, skill level points of the player. (Thinking about it now, I could have further made the curve generic by using 0-1 on the X as well and interpolate the skill points on the table.) When the curve is defined, I take the min/max values that are pre-defined, map the inbetween values using the interpolation code, which derives itself from the curve.

This was just as much to do with automation as it is with experimentation and balancing; it would take too much time to keep tweaking a list of skill values vis a vis a corresponding item for that skill value (eg “how much disguise bonus do we award a player who wears a hoodie at a given skill level?”).

Linear interpolation is quick and dirty, but is simply a compromise. I could have compromised and put more code into Unity to interpolate internally, but that’s just putting more code than required.

So I turned to Calc’s cell formula functionality. I have no deep understanding of Calc, so I relied on someone else’s example to learn from. Though this was not the first time I brushed with polynormals, coefficients, and plotting curves, I’m math-stupid, so it takes me some time to figure it out. This kind of math is something that always interested me, but interest and talent are two different things. I wish I was smarter in math; it would make my life so much easier.

Anyway, after 2 hours looking into the math, I figured out what the example was getting at. With this technique sorted, it frees me up to implement more lookups that require curve interpolation. It’s easier to see what’s going, instead of just looking at numbers. Also, it’s much easier to tweak the system, to balance the game as I continue to develop.

Unity: ScannerClass

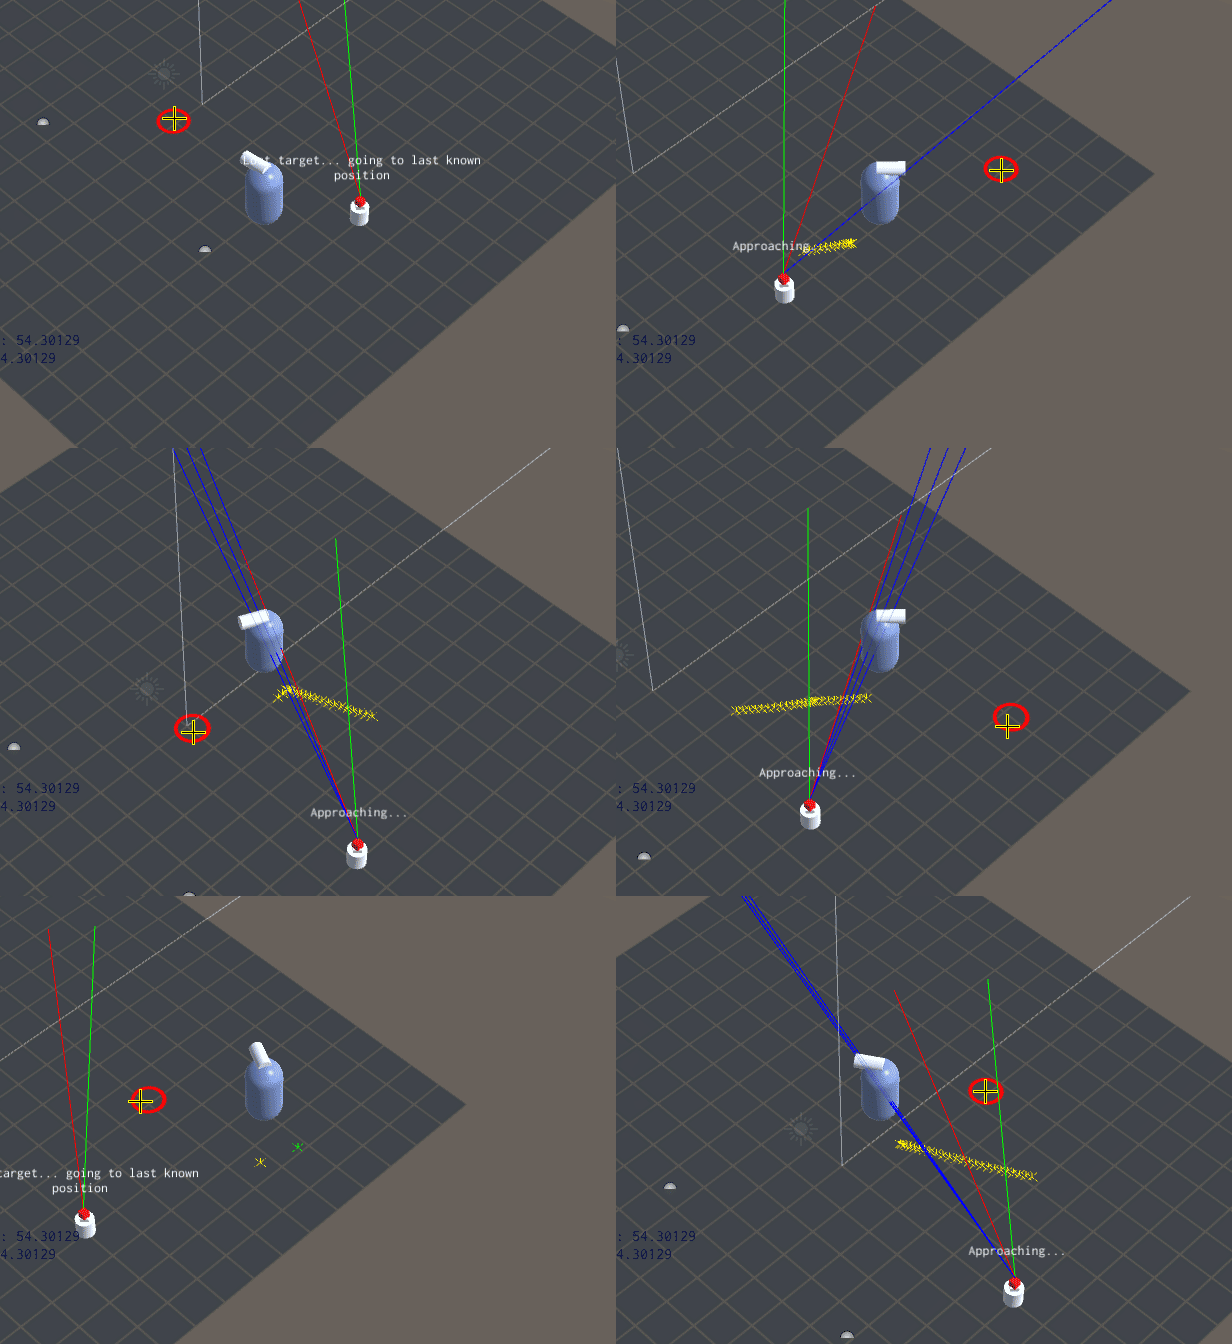
ScannerClass in action. Robot is targeting the player; green line is where the robot is facing; the red line is the centre of the scan direction, and the blue line is an indicator that robot has a positive LOS on its target. Note that when player beyond maximum scan angle (ie red line is limited to a certain angle), LOS is still positive until it goes beyond the field-of-view of the scan direction.

This class was a functionality that I deferred when I was creating the robot’s ‘game’ class. Originally, I had simply used a Raycast to determine LOS; I knew a scanning behaviour was needed, so I coded the robot generically in that respect.

The ScannerClass is attached to a scanning object that is parented under the the robot’s root transform. The behaviour is that it scans around (oscillating pattern or full revolution) using the parent transform as its base direction. The class itself rotates the scanner game object for (my) convenience.

When the RobotGameClass asks ScannerClass for LOS to a specified target (usually the target that attacked it), the scanner will determine at that time if the target had been found; if so, it locks on to it. The RobotGameClass, meanwhile, instructs the RobotMovementClass to face and move towards target, making the the scanner face the target naturally. If the target gets lost out of sight, the lock is broken by the ScannerClass itself and it goes back to scanning, and based on the RobotGameClass AI, it will either reacquire or not.

What I learned from the coding the ScannerClass was more awareness of how rotations — expressed in Quaternions — and vectors are translated to and from each other. Because the scanner is controlled by a ‘scan angle’, which is a float, I needed to make a procedure to translate target vectors to Quaternion rotations to get to the Euler angles. It sounds a bit convoluted, but I think to keep the simplicity of the driving values, which is where the source of the confusion often is, the messy bit had be sorted out that way.

Unity: Waypoint with ‘wait’ behaviour

waypoints_with_wait_behaviour

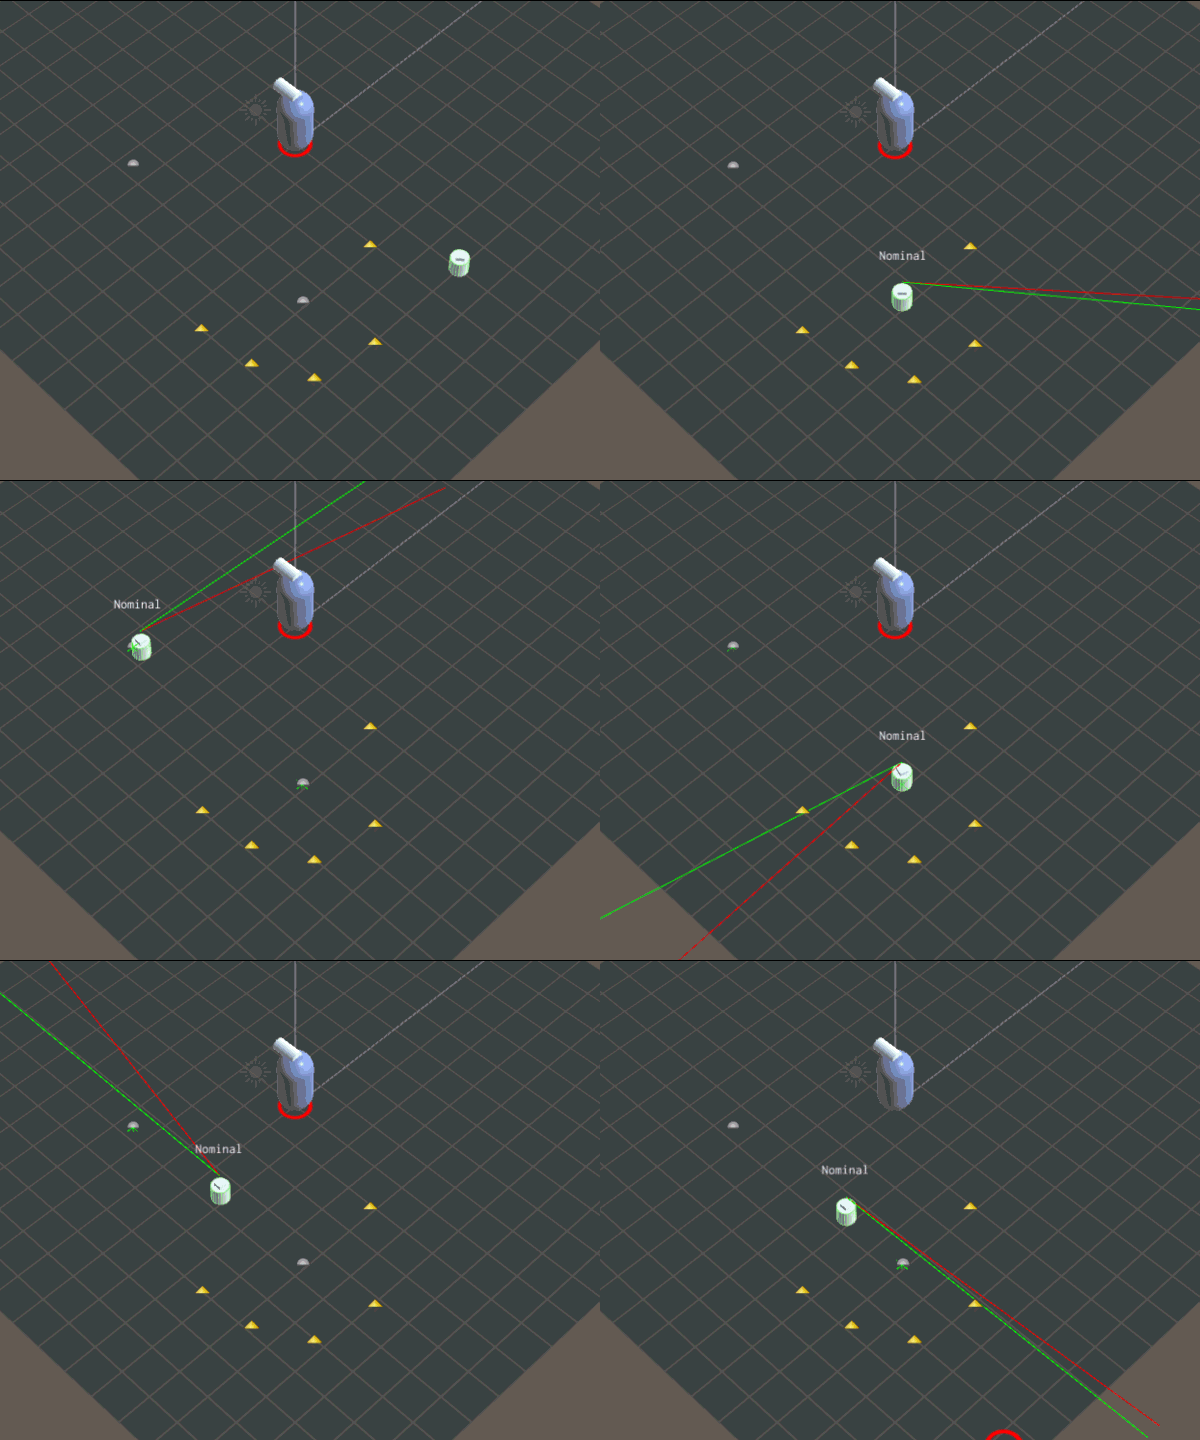
So here’s some visual aids!

The GIF above shows a simple waypoint system with an implicit behaviour system on the NavAgent game object. Currently, there’s only a ‘wait’ behaviour. The waypoints themselves have a WaypointClass which are driving the values in the NavAgent object. The trickiest bit, as usual, was the timing of TimerClass objects, and the proper way of stopping a NavMesh smoothly.

Unity: TimerClass

Ok, for seasoned (or maybe even not-so-seasoned) Unity developers, this is probably nothing. But I have been childishly happy about this TimerClass I’m trying to implement. It’s simplicity is what makes it exciting.

The TimerClass that I’m coding is a self-contained timer whose only requirement is that it is updated per Time.deltaTime; thus it needs to be called at the top of every Update(). This works for me because it’s neat to see all the timers up in one area instead of spread out through the code.

Before I get into the specific things that I like, this is how  the code looks like (written in Unityscript/Javascript):

#pragma strict

// This TimerClass keeps track of a timer
class TimerClass
{
	var timer_name:String;
	var end_time:float = 0; // the end time before the timer sends a signal to say time is up
	var counter: float = 0; // the counter for time
	var switchname:String; // whether the timer should keep on adding delta time or not
	var component:Component;
	var expired:boolean = false; // this notes whether the Timer had been previously started and now has expired; needs StartTimer do make a clean start
	// this.GetType().GetField(attrname).SetValue(this,parseInt(str));
	function TimerClass()
	{
		
	}
	function TimerClass(tn:String, sn:String, et:float, c:Component)
	{
		timer_name = tn;
		switchname = sn;
		end_time = et;
		component = c;
	}
	function UpdateTime(val:float)
	{
		var timerswitch = component.GetType().GetField(switchname).GetValue(component);
		if(timerswitch == true) // if the switch is TRUE
		{
			if(TimeUp() == false) // if the time is not up, then keep on adding time to the counter
				counter += val;
			else
			{
				component.SendMessage(timer_name+"_TimeUp",SendMessageOptions.DontRequireReceiver);
				EndTimer(); // end timer itself
			}
			
		}
	}
	function IsRunning()
	{
		var timerswitch = component.GetType().GetField(switchname).GetValue(component);
		return(timerswitch); // if the swtich is on, this means the timer is running
	}
	function StartTimer()
	{
		// this makes the switchname turn on
		component.GetType().GetField(switchname).SetValue(component,true);
		ResetTimer();
	}
	function StopTimer()
	{
		component.GetType().GetField(switchname).SetValue(component,false);
	}
	function EndTimer()
	{
		component.GetType().GetField(switchname).SetValue(component,false);
		expired = true;
	}
	function ResetTimer() // returns true if time is up
	{
		counter = 0;
		expired = false;
	}
	function TimeUp() // returns true if time is up
	{
		return(counter >= end_time);
	}

}

The two things that I like about this TimerClass is its feature to query a conditional boolean variable directly from the source Component that instantiated it, and the SendMessage mechanism based on the timer’s name, which is mandatory.

The class is instantiated in this way:

Timer = TimerClass("WaitTimer","is_waiting",5,this);

The first argument is the name of the timer, and this is concatenated with “_TimeUp” in order to form the SendMessage function. In the same script, a function is thus defined:


function WaitTimer_TimeUp()
{
...
}

The second argument is the ‘switch’ variable, which is a variable that is local to script. Note that it’s a String, not a variable reference; that’s because it’s not possible (for me) in Unityscript/Javascript to pass variables by reference. However, using Net Reflection techniques you can retrieve a ‘field’ from another Component using literal string.

The third argument is the number of seconds it takes for the timer to end or expire.

The fourth argument is ‘this’, which is the reference to the Component that has instantiated the TimerClass. This Component reference is used to retrieve the field specified in the second argument.

Reflection and SendMessage in action in the UpdateTime() function:

	function UpdateTime(val:float)
	{
		var timerswitch = component.GetType().GetField(switchname).GetValue(component);
		if(timerswitch == true) // if the switch is TRUE
		{
			if(TimeUp() == false) // if the time is not up, then keep on adding time to the counter
				counter += val;
			else
			{
				component.SendMessage(timer_name+"_TimeUp",SendMessageOptions.DontRequireReceiver);
				EndTimer(); // end timer itself
			}
			
		}
	}

This TimerClass has simplified enormously the tracking of timers across the game; I’m glad that I’ve actually started addressing this issue early on, as I know that would just get worse down the line if I didn’t have an elegant solution for it. I’m sure there’s still a lot I could improve, but I feel happy to have made a start.
Unity and Second Steps

I’ve not been completely been informing this quiet corner of the interwebs of a little venture — equally as quiet — that saw me in the aftermath of shelving Zombots. The (temporary?) abandonment of Zombots was a decision come to all those concerned. If I were honest — and I was — Zombots wasn’t hitting the kind of obsessive note in me, and I couldn’t get to the same level of passion when I was developing Janus. So, it was just a matter of time before I had to drop it.

However, the upside to Zombots was that it allowed me to play, to get my feet wet with the first steps into Unity. Zombots allowed me to experiment and get used to its system and its scripting without having to concern myself too much with the structure of the game. It taught me a lot of things, and that’s why I’ve gathered more confidence in trying to make a game inspired by an old one from my childhood.

When I look down, I find the task so daunting that I feel like I’m crazy sinking so much time on this. But I don’t want to look down, I don’t want to rationalise potential. I don’t want to be distracted by anything.

On another note, and the primary reason for this post, I humbly managed to implement my first custom interface called ICombatMessage. I hooked it up this way:

public interface ICombatMessage extends IEventSystemHandler
{
    function OnBeingAttacked(attacker:GameObject);
}

… extending from IEventSystemHandler is required. This registers _OnBeingAttacked_ as an EventFunction under ICombatMessage.

Now the next bit is implementing that; so in the CombatClass.js, where the event function needs to fire (to inform the target that it is being shot at):

ExecuteEvents.Execute.<ICombatMessage>(target,null,function (x,y) { x.OnBeingAttacked(shooter);});

… the syntax of which confused me at first because there were no Unityscript examples (only C#). At any rate, the .<ICombatMessage> refers to the Type (ie <> denotes Type of the Type that’s put inside). Then the rest are almost self-explanatory. The functor, or what I see as a lambda function, is the EventFunction and based on the linked docs, an EventFunction always carries the handles (which refers to the function I had defined — OnBeingAttacked) and a BaseEventData object, which is something I didn’t use.

So with that in place, I implement ICombatMessage in CombatantClass.js:

function OnBeingAttacked(attacker:GameObject)
{
   Debug.Log("HELP!");
}

Zombots

I’m working on a little game project. I emphasize that it’s a little project because a lot of consideration has been made to keep it as simple. I want to downplay its significance so it keeps me happy enough to work on it without the added burden of spectral expectations.

I’m working on it with Richard Falla, a friend and co-worker of mine who I’ve also worked with on different commercial projects in Toybox. During one lunch time, Richard, Terry, and I discussed how many 5 year-old kids we could take out before we got taken out ourselves. This light-hearted pondering over violence on little kids captured our interest, and became the basis, the seed, of this game.

At first, we were both decided on doing it as a top-down or isometric sprite-based 2D game. I had been working with Construct 2 for some time doing an RPG experiment (read: Shelved project) and thought it would be a good place to start. Richard drew up some animated sprites for me to test with and although I got something rudimentary thing working, I quickly realised something. The concept of Zombots was getting a mob/crowd of zombie robot kids attacking the player. C2 did not have anything — that I knew of — related to crowd-based pathfinding and AI that I can employ readily and be able to tweak as needed. I wasn’t interested — nor qualified — in coding a scratch-built AI pathfinding system in a C2 (HTML5) JavaScript environment, I quickly lost interest and gradually let the game scuttle up The Shelf.

Then some months later, Richard and I went back to talking about it. Unity cropped up in our conversation because I had dabbled in Unity before — as had Richard — and I was quite aware of its NavMesh/pathfinding features. I knew that among all of the other game engines out on the playing field, Unity would arguably have the most user-friendly implementation (for my coding background, that is). But would we get the 2D/illustration-like feel in 3D? In the absence of any real solution in C2, or similar game makers, and that Unity was freely available for personal use, we decided ‘why the hell not?’ Like I said, I had only dabbled in Unity never having enough reason to dig further. But this time, the momentum seemed to keep building.

Richard provided a proxy character model that I rigged it in AdvancedSkeleton; I did some idle and run animations, exported it via FBX, and from there, things progressed smoothly. Richard pointed to me a Unite conference tutorial on game-making which reflected many aspects of what we intended our own game to be. (Looking at it now, however, it doesn’t seem that similar.) I followed the tutorial most of the way, and more than a refresher course, I got to understand better how things worked in Unity.

I must admit, however, that this game isn’t the kind of game I’ll be picking up on Steam. I tend to play games like The Division, or Splinter Cell, or something with a serious theme, or something retro. For those who know me, a zombie game — be it robotic or organic zombots — of all things, wouldn’t be readily associated with me. But I think that’s what makes me less invested and more methodical in my approach. I see the game as a big program full of yet-undiscovered bugs, as a simple but (hopefully) entertaining system of ropes and pulleys. I can approach this game from a purely technical standpoint, and a purely creative one, because my own desires doesn’t get in the way.

I’ve been documenting my progress in a private developer’s diary, and perhaps after the alpha is ready, I’ll be more encouraged to make different aspects of the development more public. As it is, I’ve never done a game before, so the only professional claim I have to this is the fact that I’m working in 3d, and working with code; that being the case, I keep my enthusiasm to myself to prevent it from leaking out. It’s like keeping the warmth in by not opening the window.