Unity: ScannerClass

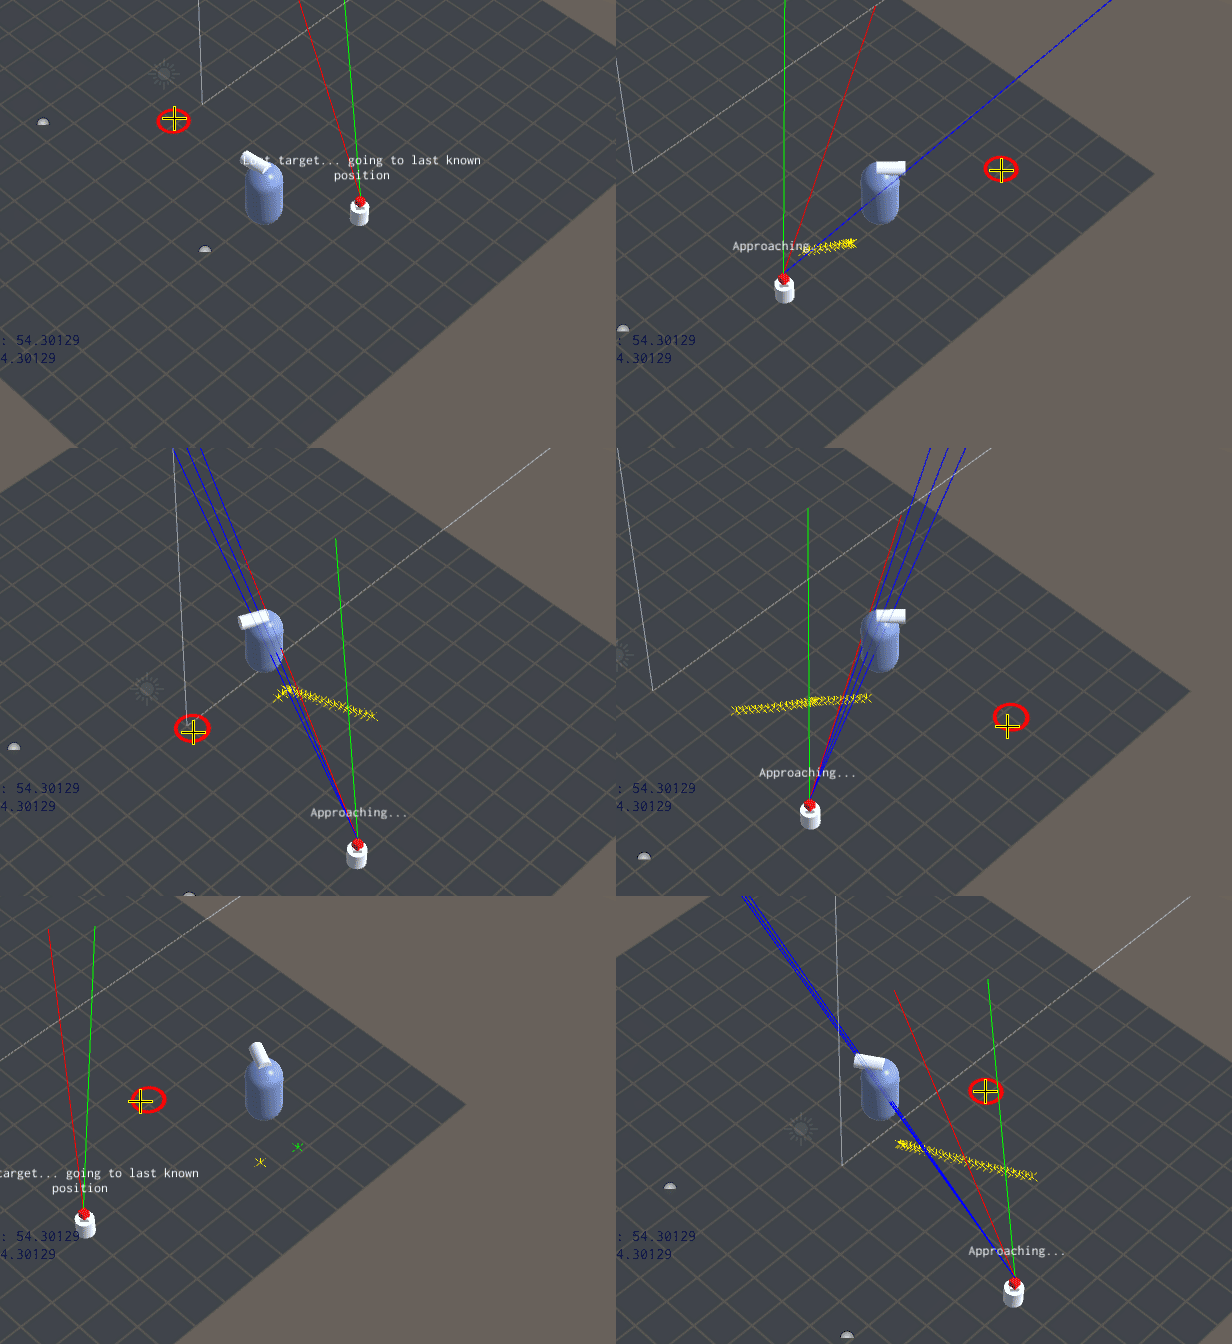
ScannerClass in action. Robot is targeting the player; green line is where the robot is facing; the red line is the centre of the scan direction, and the blue line is an indicator that robot has a positive LOS on its target. Note that when player beyond maximum scan angle (ie red line is limited to a certain angle), LOS is still positive until it goes beyond the field-of-view of the scan direction.

This class was a functionality that I deferred when I was creating the robot’s ‘game’ class. Originally, I had simply used a Raycast to determine LOS; I knew a scanning behaviour was needed, so I coded the robot generically in that respect.

The ScannerClass is attached to a scanning object that is parented under the the robot’s root transform. The behaviour is that it scans around (oscillating pattern or full revolution) using the parent transform as its base direction. The class itself rotates the scanner game object for (my) convenience.

When the RobotGameClass asks ScannerClass for LOS to a specified target (usually the target that attacked it), the scanner will determine at that time if the target had been found; if so, it locks on to it. The RobotGameClass, meanwhile, instructs the RobotMovementClass to face and move towards target, making the the scanner face the target naturally. If the target gets lost out of sight, the lock is broken by the ScannerClass itself and it goes back to scanning, and based on the RobotGameClass AI, it will either reacquire or not.

What I learned from the coding the ScannerClass was more awareness of how rotations — expressed in Quaternions — and vectors are translated to and from each other. Because the scanner is controlled by a ‘scan angle’, which is a float, I needed to make a procedure to translate target vectors to Quaternion rotations to get to the Euler angles. It sounds a bit convoluted, but I think to keep the simplicity of the driving values, which is where the source of the confusion often is, the messy bit had be sorted out that way.

Commercial: Dilmah Green Tea

Click to see video.
Click to see video.

This is the first project I ever done for my current company (as a freelancer). My contribution, simply, was the RF fluid sim at the end. Dominic wanted to simulate the twisting shape that forms usually at the nozzle of a spout or tap, so he twisted his golden ribbon. I couldn’t get RF to sim in that way, so I let RF run normally and used Maya’s wrap deformer on top of the RF bins. Quite a simple solution, which I liked.

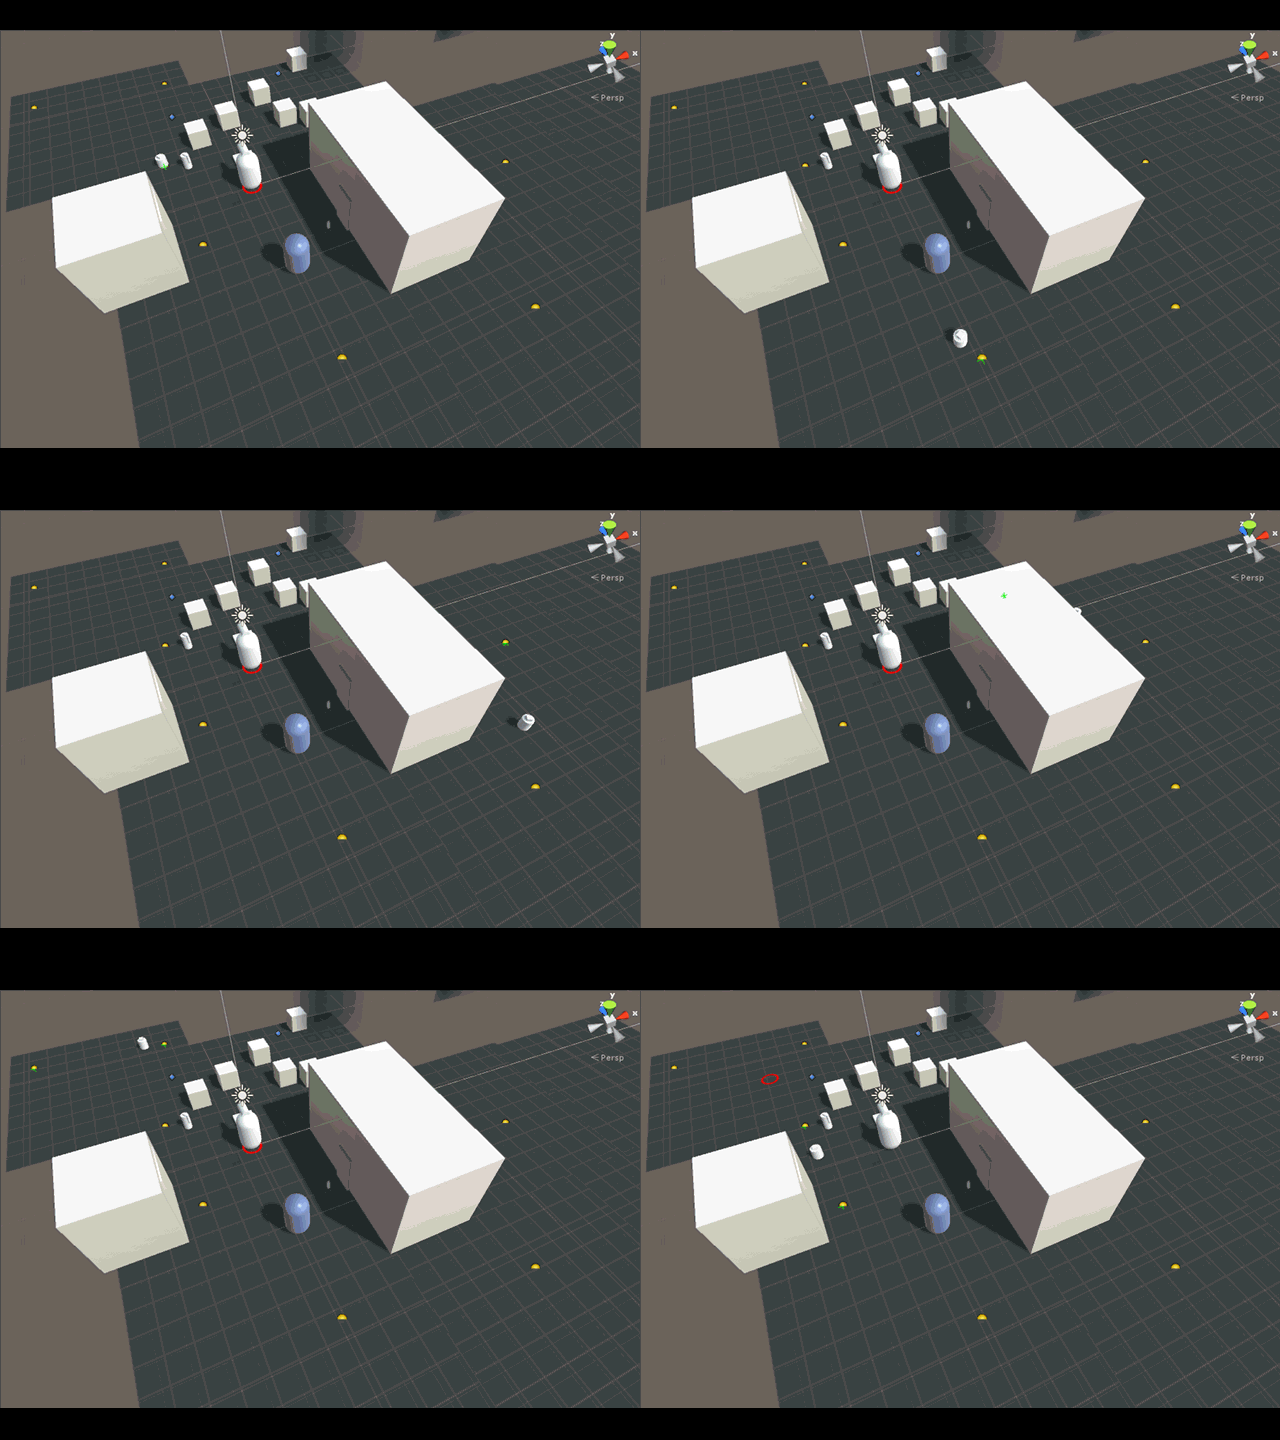
Unity: Waypoint with ‘wait’ behaviour

waypoints_with_wait_behaviour

So here’s some visual aids!

The GIF above shows a simple waypoint system with an implicit behaviour system on the NavAgent game object. Currently, there’s only a ‘wait’ behaviour. The waypoints themselves have a WaypointClass which are driving the values in the NavAgent object. The trickiest bit, as usual, was the timing of TimerClass objects, and the proper way of stopping a NavMesh smoothly.

Unity: TimerClass

Ok, for seasoned (or maybe even not-so-seasoned) Unity developers, this is probably nothing. But I have been childishly happy about this TimerClass I’m trying to implement. It’s simplicity is what makes it exciting.

The TimerClass that I’m coding is a self-contained timer whose only requirement is that it is updated per Time.deltaTime; thus it needs to be called at the top of every Update(). This works for me because it’s neat to see all the timers up in one area instead of spread out through the code.

Before I get into the specific things that I like, this is how  the code looks like (written in Unityscript/Javascript):

#pragma strict

// This TimerClass keeps track of a timer
class TimerClass
{
	var timer_name:String;
	var end_time:float = 0; // the end time before the timer sends a signal to say time is up
	var counter: float = 0; // the counter for time
	var switchname:String; // whether the timer should keep on adding delta time or not
	var component:Component;
	var expired:boolean = false; // this notes whether the Timer had been previously started and now has expired; needs StartTimer do make a clean start
	// this.GetType().GetField(attrname).SetValue(this,parseInt(str));
	function TimerClass()
	{
		
	}
	function TimerClass(tn:String, sn:String, et:float, c:Component)
	{
		timer_name = tn;
		switchname = sn;
		end_time = et;
		component = c;
	}
	function UpdateTime(val:float)
	{
		var timerswitch = component.GetType().GetField(switchname).GetValue(component);
		if(timerswitch == true) // if the switch is TRUE
		{
			if(TimeUp() == false) // if the time is not up, then keep on adding time to the counter
				counter += val;
			else
			{
				component.SendMessage(timer_name+"_TimeUp",SendMessageOptions.DontRequireReceiver);
				EndTimer(); // end timer itself
			}
			
		}
	}
	function IsRunning()
	{
		var timerswitch = component.GetType().GetField(switchname).GetValue(component);
		return(timerswitch); // if the swtich is on, this means the timer is running
	}
	function StartTimer()
	{
		// this makes the switchname turn on
		component.GetType().GetField(switchname).SetValue(component,true);
		ResetTimer();
	}
	function StopTimer()
	{
		component.GetType().GetField(switchname).SetValue(component,false);
	}
	function EndTimer()
	{
		component.GetType().GetField(switchname).SetValue(component,false);
		expired = true;
	}
	function ResetTimer() // returns true if time is up
	{
		counter = 0;
		expired = false;
	}
	function TimeUp() // returns true if time is up
	{
		return(counter >= end_time);
	}

}

The two things that I like about this TimerClass is its feature to query a conditional boolean variable directly from the source Component that instantiated it, and the SendMessage mechanism based on the timer’s name, which is mandatory.

The class is instantiated in this way:

Timer = TimerClass("WaitTimer","is_waiting",5,this);

The first argument is the name of the timer, and this is concatenated with “_TimeUp” in order to form the SendMessage function. In the same script, a function is thus defined:


function WaitTimer_TimeUp()
{
...
}

The second argument is the ‘switch’ variable, which is a variable that is local to script. Note that it’s a String, not a variable reference; that’s because it’s not possible (for me) in Unityscript/Javascript to pass variables by reference. However, using Net Reflection techniques you can retrieve a ‘field’ from another Component using literal string.

The third argument is the number of seconds it takes for the timer to end or expire.

The fourth argument is ‘this’, which is the reference to the Component that has instantiated the TimerClass. This Component reference is used to retrieve the field specified in the second argument.

Reflection and SendMessage in action in the UpdateTime() function:

	function UpdateTime(val:float)
	{
		var timerswitch = component.GetType().GetField(switchname).GetValue(component);
		if(timerswitch == true) // if the switch is TRUE
		{
			if(TimeUp() == false) // if the time is not up, then keep on adding time to the counter
				counter += val;
			else
			{
				component.SendMessage(timer_name+"_TimeUp",SendMessageOptions.DontRequireReceiver);
				EndTimer(); // end timer itself
			}
			
		}
	}

This TimerClass has simplified enormously the tracking of timers across the game; I’m glad that I’ve actually started addressing this issue early on, as I know that would just get worse down the line if I didn’t have an elegant solution for it. I’m sure there’s still a lot I could improve, but I feel happy to have made a start.
Unity and Second Steps

I’ve not been completely been informing this quiet corner of the interwebs of a little venture — equally as quiet — that saw me in the aftermath of shelving Zombots. The (temporary?) abandonment of Zombots was a decision come to all those concerned. If I were honest — and I was — Zombots wasn’t hitting the kind of obsessive note in me, and I couldn’t get to the same level of passion when I was developing Janus. So, it was just a matter of time before I had to drop it.

However, the upside to Zombots was that it allowed me to play, to get my feet wet with the first steps into Unity. Zombots allowed me to experiment and get used to its system and its scripting without having to concern myself too much with the structure of the game. It taught me a lot of things, and that’s why I’ve gathered more confidence in trying to make a game inspired by an old one from my childhood.

When I look down, I find the task so daunting that I feel like I’m crazy sinking so much time on this. But I don’t want to look down, I don’t want to rationalise potential. I don’t want to be distracted by anything.

On another note, and the primary reason for this post, I humbly managed to implement my first custom interface called ICombatMessage. I hooked it up this way:

public interface ICombatMessage extends IEventSystemHandler
{
    function OnBeingAttacked(attacker:GameObject);
}

… extending from IEventSystemHandler is required. This registers _OnBeingAttacked_ as an EventFunction under ICombatMessage.

Now the next bit is implementing that; so in the CombatClass.js, where the event function needs to fire (to inform the target that it is being shot at):

ExecuteEvents.Execute.<ICombatMessage>(target,null,function (x,y) { x.OnBeingAttacked(shooter);});

… the syntax of which confused me at first because there were no Unityscript examples (only C#). At any rate, the .<ICombatMessage> refers to the Type (ie <> denotes Type of the Type that’s put inside). Then the rest are almost self-explanatory. The functor, or what I see as a lambda function, is the EventFunction and based on the linked docs, an EventFunction always carries the handles (which refers to the function I had defined — OnBeingAttacked) and a BaseEventData object, which is something I didn’t use.

So with that in place, I implement ICombatMessage in CombatantClass.js:

function OnBeingAttacked(attacker:GameObject)
{
   Debug.Log("HELP!");
}

Commercial: China Southern Air

china_southern_air_thumb_1
Click to play video.

I worked on this with Dominic Taylor who had set up the comps, cameras, and worked with the clients on the direction. I mainly did the flipboard effect.

This was quite a challenging and difficult effect to do in Maya. The main driver of the rotations was expressions; the expression were taking their values from samples from textures, which were generated from AE. The main difficulty lay in the fact that it was slow, and it needed to be baked out before it could be sent to the farm because setAttr was the mandatory method of applying the motions.

The flipboard effect was not only flipping from image A to image B; in fact, it goes through a series of photographs before it resolves into the final, and designing the mechanics of the scene took some tries before getting right.

In retrospect, LW’s nodal displacement in conjunction with Denis Pontonnier’s Part Move nodes is a superior method. Where it took me about week to get all the shots set up in Maya, I think I would have done the same in LW for less than half the time.


Commercial: NSW Communities (Cogs)

Click to play video.
Click to watch video.

This was done a relative quick job for the New South Wales government. They had, in fact, recently come back to us for a ‘phase 2’ ad along the same lines, only the deadline was a bit shorter.

The ad was in two parts: the cogs and the town hall scene. I’ll just talk about the cogs scene because that was the only part I was involved in.

I was asked to create the cogs that formed the NSW state lines. We bought a few gears off Turbosquid to get started, but other bits and pieces had to be modelled along the way. I had first set up the layout of the gears, and rigged sections of them to follow different controllers. Then individual gear component combinations were rigged, and then placed into the main scene.

The rendering was also done in LightWave, but the final look was supposed to be hand-drawn. This process was in 3 parts.

The base render was from LW, which was a clean, multi-toned render. LW enables me to colour individual gears/items based on the fact that they are instanced or separated, and I used this to quickly shade variations of the colour theme. I like the fact that I can get lots of shading control across whatever shader channel (eg diffuse, specularity) that I’m using.

After the base render, Richard post-processed that in AE using his own concoction of adjustment layers and textures.

And for the third step, Richard‘s AE renders were passed on to Alexandre Belbari and Thomas Buiron, who gave it the more sketchy, organic look.

When it came back to us, Richard add further effects such as the smoke and particles.


Commercial: Massey University (A Perfect Example)

Like the name, this commercial is a near-perfect example of this work thread: minor work that tempts itself to be cast aside for being inconsequential. And yet, added together, everything is given its proper recognition.

I contributed to the library scene in this commercial. The car driving through the library is obviously real (is it? :) ), but the greenscreened car would not have appropriate reflections of the environment. So, I went to the shoot to take HDR spherical panos of the library, where the car was supposed to drive through.

Back in the studio, we were given the car’s (dodgy) CAD data, which I repaired extensively. Using other reference photos of the library, including the footage, I recreated the library to cast proper reflections on the cg car. I matchmoved the footage, and further hand-tracked it for pixel-accuracy, rendered the reflection pass. Leoni comped the final shot.

Commercial: Spark Digital

spark_digital_thumb_2
(Click to watch video)

This was a crazy one, though a bit hard to explain how. If you find that above commercial is somewhat stylistically schizophrenic, then that goes some way in not having to explain a whole lot more. Like many of the works I do, it’s hard to claim substantial ownership, hence the sometimes-lengthy commentary.

I contributed a few sequences to this ad: the hacker-chess-armour-snow globe sequence that starts with Julian Stokoe‘s illustration of the hacker with a computer I put in there. I also did the pinball animation sequence before that.

Another good reason to break down some of my works is that I, myself, take my own work for granted. Before I reviewed the clip, I recalled that the pinball animation was my only contribution. Sure, this reflects the hectic day-to-day work, and my pathetic memory, but it underlines the need to give credit where it is due; less about outward or social recognition, but a true appreciation of what tends to be forgotten or ignored, even by me.